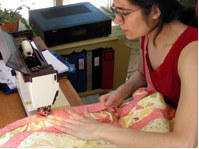
Binding Services

Rates for each step:
Make binding with fabric* you supply
$0.075 per linear inch
Attach **standard binding to quilt
$0.10 per linear inch
Hand OR Machine finishing
$0.15 per linear inch
Rates for partial or whole service:
Make and attach binding (with your fabric*) for YOU to hand or machine finish
$0.175 per linear inch
Attach **standard binding you supply to quilt and Hand OR Machine finish for a completed quilt.
$0.25 per linear inch
Make, attach AND Hand OR Machine finish **standard binding so you receive a finished quilt
$0.30 per linear inch
Make, attach AND Hand OR Machine finish Bias binding so you receive a finished quilt $0.33 per linear inch
NOTE: Making and / or applying strip-pieced binding, binding on curves or other special applications may cost extra. *Click here to find out how much yardage is needed for binding. **Standard binding is made from strips cut from the width or length of fabric.$35 minimum charge for binding services.
HOW TO: Making your own Straight-of-grain or "standard" binding:
1. To figure how much binding to make, find the perimeter measurement of your quilt:
a.Measure the width ________ + length _________ = ________
b.Multiply the above total x 2 ___________. That is the perimeter.
Example: If your quilt is 60"x80", the perimeter is 60"+80"=140" 140" x 2 = 280" total perimeter.
2. Add an extra 15 inches to the perimeter measurement for seaming and turning corners.
Example: 280"+15"= 295" total of binding needed.
3. Divide total length of binding needed by length of strips you will be cutting and round up to the next whole number.
(Example: if you need 295" total and are cutting 45" strips from the width of the fabric, you will need 295 / 45 = 6.555 strips. Round up and cut 7 strips.
4. Cut strips. (Strips may be cut widthwise or lengthwise with the grain but you MUST cut bias strips if appling binding to a curved edge.)
(For approximately 3/8" wide finilshed binding, cut strips 2 1/2" wide.)
5. Sew strips together with seam on a 45 degree angle. (Using an angled seam distributes the seam's bulkiness for a smoother finished binding.)
6. Press seams open.
7. Press binding longways with wrong sides together so the finished product is half the cut width (or 1 1/4" wide with cut edges together and a fold on the other side.)
8. To keep binding neat until it is ready to be used either Fan fold and pin through all layers, wrap around a piece of cardboard and pin the end in place or make jellyroll and pin the end.
VIDEO HOW TO: Basic Binding
Jenny from Missouri Star Quilt company - "The Ultimate Quilt Binding Tutorial"
Subjects covered:
How to make your own straight-of-grain binding, bias seams to join binding strips.
Sewing binding to the quilt including the folded mitre corners, Joining the beginning and end of binding.
Threading needle and how to knot, Hand stitching binding to the back, how to fold and sew the corners by hand.
VIDEO HOW TO: Flange Binding
Jenny Doan from Missouri Star Quilt company - "Missouri Star Baby Quilt with Flange Binding: Easy Quilting Tutorial"
Subjects covered:
Jenny demonstrates flange binding while teaching an easy way to make a baby quilt out of one Missouri Star Block.
VIDEO HOW TO: Binding a Circle
Laura Ann Coia - SewVeryEasy - "How to Bind a Round Quilt Inside and Outside Sides"
With a few tips and tricks, Laura makes binding around Quilt lay flat and look great, both outside and inside curves. Subjects covered:
Type of binding to use and size, how to start and end, tips for outside curves, tips for inside curves.
VIDEO HOW TO: The "Perfect" Binding and Hand-stitched Finishing
...Binding for the detail-oriented person or the Advanced Quilter.
In this video tutorial, Sharon Schamber walks you through the process of applying the perfect binding to your quilt including the Hand-stitched finish. - "Sharon Schamber - Perfect Straight Binding"
Subjects covered:
What quilt judges look for in binding.
Supply list.
Making the binding: preparing the fabric, cutting strips, mitered or bias seams, starching and pressing.
Attaching binding to the top of the quilt: "why and how" to glue the binding, corners, stitching binding to the quilt, joining beginning and end.
Finishing: Turning binding to the back, ironing the front, getting the "perfect" mitered corners.
Hand stitching on the back: type of needles, thread and finger cot used, the quilter's knot, the "ladder" stitch, stitching the corner.
HOW TO: Curved Binding and Machine-Stitched Finishing
Learn a precise curved binding technique! This tutorial details preparing fabric with heavy starch for accurate cutting and control. It demonstrates gluing seams for stability before stitching and finishing the binding.
Sharon Schamber - The Perfect Curved Binding
Glue basting supplies:
sharonschamber.com/


